FREE US SHIPPING ORDERS OVER $15
Give Your Car A Clay Bar Treatment the Right Way

HOW TO GIVE YOUR CAR A CLAY BAR TREATMENT THE RIGHT WAY

In this article you will learn:


  • When you should give your car a clay bar treatment

  • How to use a clay bar properly to prep and decontaminate your finish

  • The best way to make detailing clay last
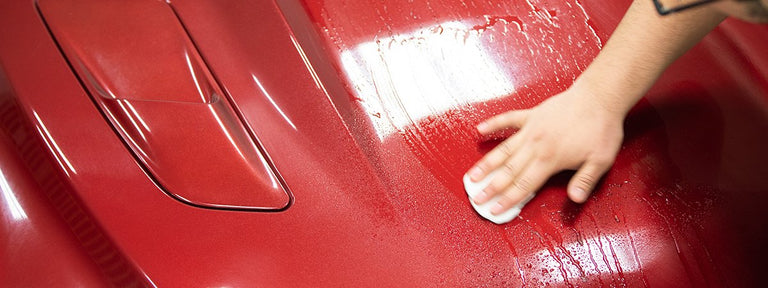
Many car owners think that the final step to any successful car wash is to hand dry their vehicle with a couple of microfiber towels. And while your car may look squeaky clean after that weekend car wash, looks can be deceiving.

There may still be thousands, if not millions, of microscopic contaminants embedded in your clear coat. These contaminants can't be removed using a regular car wash soap, and waxing or polishing over them can create scratches and swirls in your paint finish. Luckily, there is a way to get rid of these stubborn pollutants; all you need is a clay bar, some clay bar lubricant and a microfiber towel!

If you’re wondering how a hunk of clay will solve your auto detailing problems, then read on! It’ll all make sense after reading this article.

What you need to know

The longer dirt and stains are allowed to dwell on your car, the more likely they are to become embedded in your clear coat. If you’ve gone several weeks, or even months, without washing your car, there may still be traces of brake dust, bird droppings and water spots stuck to your finish after you scrub away the stains.

Clay bars are made of a special detailing resin that allows you to grab and pull contaminants from the clear coat to deep clean your finish and prep your paintwork for polishing. Car detailing professionals use a clay bar any time they’re going to perform a paint correction or apply a new layer of wax to their finish. Not only does this ensure that they’ve removed all the soils and pollutants from the car exterior, but it also helps to create an even deeper shine. Nowadays, there are even clay mitts, towels and discs on the market to help you decontaminate your finish, but clay bars are, by far, the easiest to use.

You can use a method called the “baggie trick” to easily determine whether your car needs a clay bar treatment. Just take out a plastic Ziploc or sandwich bag and pull it over your hand like a glove. Then, glide your hand over the surface of your car. The plastic bag will make it easier to feel any stubborn contaminants stuck in the clear coat. If your paint surfaces feel smooth and glassy, then it's safe to skip the clay bar treatment and jump straight to polishing or waxing your car. However, if you feel any gritty textures as you rub the surface of your car, then you have some contaminants stuck in your finish. You’ll need to use a clay bar and lubricant to remove these soils from the clear coat and prep your car for the next step in your detailing routine.

decontaminate your finish

Wash and dry your car

Start by washing your car from the top down with a car wash mitt and an all-purpose car wash shampoo like M.A.X. Power Detergent and a bucket of water. Continue to scrub until you’ve lifted all the stains and soils from your vehicle, then rinse your car thoroughly with agarden hose. Towel dry using a fresh, microfiber towel.

m.a.x. power detergent and a bucket of water

Separate and shape your clay

Pull your clay bar into two halves and return one half to the package. Shape the other half of your clay into a flat oval about the size of your palm. You only need as much clay as will fit in your hand. Clay bars pick up contaminants easily, so if you drop it,you won’t be able to use it again. Applying a dirty clay bar to your finish will scratch or damage your vehicle’s paint surfaces. Throw it away and retrieve the clean half you placed back in the package.

Apply clay bar lubricant

Add a quarter-sized drop of clay bar lubricant to your detailing clay, as well as directly to a 2’ x 2’ section of your car. This will make it easier to slide the clay bar over the surface of your car without pushing contaminants deeper into the clear coat.

slick & slide lubricant spray

Rub the clay into your finish

Next, you’re going to rub the clay over the surface of your car using a back-and-forth motion to pull the contaminants from your paint finish. Avoid circular motions to prevent leaving any scratches or swirls in the clear coat. Once the surface of your clay starts to feel or look dirty, knead the clay and reshape it to reveal a fresh side, continuing to work in the same 2’ x 2’ section. Be sure to apply additional lubricant as needed.

rubbing clay

Check your work

Once you’ve clay barred the entire section, use the baggie trick to check your work. If the surface of your car still feels gritty, continue to apply the clay bar to this section until it feels smooth like glass. If the area feels smooth, use a clean, microfiber cloth to wipe away any lubricant and residues and repeat these steps on the next section of your car. Continue working in 2’ x 2’ sections until you’ve treated the entire car.

the “baggie trick”

Follow up with a polish and wax

And just like that, you've clay barred your car like the pros do. Now that your car is actually squeaky clean, it’s time to follow your clay bar treatment with a quick polish and wax to correct and restore your paintwork to its original, showroom gloss. We recommend our Hybrid Solutions Polish & Wax to kill two birds with one stone, erasing any scratches or imperfections left in your clear coat while delivering a long-lasting layer of ceramic protection.

hybrid solutions ceramic polish wax

WANT MORE TURTLE WAX?

Subscribe for your newsletter and the rewards will be in your inbox before you even get there

Latest

News, events and insights from Turtle Wax® worldwide

Offers

Exclusive offers and discounts on Turtle Wax® products

Rewards

Regular treats and surprises for all subscribers

Thanks! You should receive a confirmation email shortly.