In this article, you will learn:
The internet is full of videos of people cleaning their yellowed headlights with tools and products that were never designed to be used on automobiles. Toothpaste is one of the most common home remedies for lens restoration, but people have tried all kinds of things ranging from scouring powder and bathroom scrubbing gels to fingernail files and sandpaper. But how effective are these methods, are there risks to using them, and what’s the best, most affordable way to really get the job done?
If you hear stories about people getting miraculous results from cleaning their headlight lenses with toothpaste, for example, remember that those stories are missing plenty of context. These household products were not designed for use on polycarbonate headlight lenses, and there are potential downsides to using them. After all, nobody is posting videos of all the restoration failures, times when they didn’t effectively remove headlight oxidation or instances when they damaged their lenses and had to pay for repairs or replacements. These stories can and do happen, so it’s important consider those failures when you see or hear about someone restoring their headlights with a home remedy.
Many times, DIYers don’t mention the cost of their home remedies and don’t share how long it took to finish the job, especially in comparison to how long it would’ve taken with a product designed specifically for headlights. It’s entirely possible they spent more money and elbow grease using toothpaste than they might’ve with a true plastic headlight restoration kit.
Also, those online videos never show what the headlights look like two months, four months or six months down the road. In order to successfully restore cloudy, yellowed headlights to a crystal-clear finish, you need to polish away the top, oxidized layer of the headlights. When you do that, you’ll remove any protective coating, which will leave the lenses exposed to accelerated oxidation in the future. Without restoring headlights correctly, with the right products for the job, what looks good today won’t look good down the road. In fact, in the long run, those headlights may look even worse than they did before your restoration.
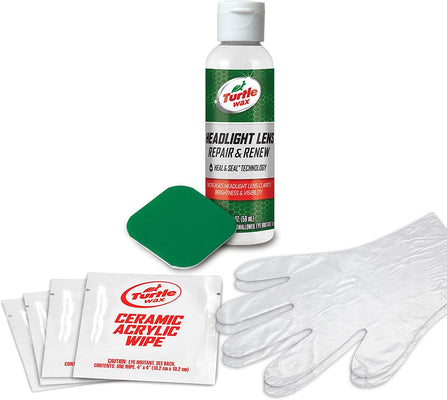
Instead of taking chances with a home remedy, we recommend using a product designed specifically as a lens restorer kit. There are a number of effective products available. We recommend the Turtle Wax Speed Headlight Lens Restorer Kit, which includes two abrasive pads with four levels of polishing power, a clarifying compound and protectant-treated wipes. We designed the kit to work effectively on all automotive headlights, so you know it will do the job well every time. As with most detailing jobs, be sure to have a clean microfiber cloth handy as well.
To start the restoration, make sure your headlight lenses are clean. If your headlights are recessed or difficult to access without touching other parts of your car, you may want to consider opening the hood and taping off any areas around the headlight.
To determine the level of oxidation on your lens, start by applying a small amount of the clarifying compound on a microfiber cloth and polish a small area of the light. If you see dramatic improvement in just a few seconds, go ahead and restore both headlight lenses using the clarifying compound and your microfiber and then seal them with the protectant wipes. Your job is done.
If the area still appears yellowed, switch to a headlight lens polishing pad. Use the least aggressive surface in the kit. Wet the pad with water and polish the lens. Again, if the yellow remains, switch to the next-most aggressive surface, wet the pad and polish the lens. Repeat this polishing process until you’ve removed all yellow discoloration from both headlights. At this point, the lens may look hazy, but don’t worry! That’s perfectly normal.
Apply a small amount of the clarifying compound to your microfiber cloth and polish the entire surface of both headlights. As you work, the haze will vanish, leaving behind a crystal-clear finish. Wipe the headlights dry with a fresh microfiber towel.
Our Speed Headlight Kit includes two kinds of protective wipes. You’ll apply the acrylic-based protectant first. Simply remove the wipe from its package and apply the solution to each headlight. Allow the coating to dry and cure. This may take several minutes depending on weather conditions. Once it has cured, apply a second protective coat, this time with the silicone-treated wipe. This sealant adds even more protection, clarity and UV protection. This is a critical step for preventing future oxidation so your headlights continue to look and work better in the long run.
When considering headlight restoration, please remember that your headlights are a critical safety feature of your car. Why risk damaging them with a home remedy when there are more effective, affordable products designed specifically to restore and protect headlights?
Take our word for it. Get the right tools for the job. We won’t steer you wrong.
Subscribe for your newsletter and the rewards will be in your inbox before you even get there
News, events and insights from Turtle Wax® worldwide
Exclusive offers and discounts on Turtle Wax® products
Regular treats and surprises for all subscribers