
FREE US SHIPPING
ORDERS OVER $15
-
Exterior
-
Interior
-
Hybrid Solutions
Featured
- MISTER CARTOON
-
Kits
Featured
- Accessories
- Learn
-
Rewards
Earn Points Today
-
Product Finder
What Are You Working On Today?
- Home
-
Exterior
- Buy One Get One Free Deals
- New
- Best Sellers
- Problem Solvers
-
Wash
- waterless
- wash & wax one steps
- extreme foam
- heavy duty cleaners
- ph neutral car wash
- exterior car glass cleaner spray
- View all Wash
- Wax, Seal & Coat
- Paint Correct
-
Restore
- headlight restoration
- restore scratch repair
- trim restoration
- bug & tar
- metal & chrome finish
- View all Restore
- Wheel & Tire
- View all Exterior
-
Interior
- Buy One Get One Free Deals
- New
- Best Sellers
- Cleaners
- Carpet, Mats & Upholstery
-
Leather Care
- leather cleaner & conditioner
- best car interior cleaning products for leather-vinyl-rubber
- View all Leather Care
- Odor Elimination
- View all Interior
-
Hybrid Solutions
- Buy 1 Get 1 Free
- New
- Best Sellers
- Ceramic
- Graphene
- Interior
- Hybrid Solutions Pro
- View all Hybrid Solutions
-
Mister Cartoon
- Mister Cartoon Air Care & Foggers
- Mister Cartoon Wash, Wax & Detailer
- Mister Cartoon Interior, LVP & Protectant
- Mister Cartoon Wheel & Tire
- View all Mister Cartoon
-
Car Care Kits
- New
- Best Sellers
- Vehicle Detailing Kits
- Exterior Kits
- Interior Kits
- Hybrid Solutions Kits
- View all Car Care Kits
-
Accessories
- New
- Best Sellers
- Wax application
- Exterior Accessories
- Interior Accessories
- Buckets
- Cutting Pads
- Towels
- Sponges & Mitts
- Apparel
- View all Accessories
- Rewards
- Learn
- Product Finder
How to Prepare & Apply Ceramic Wax On Car Exteriors
In this article, you will learn:
- One of the easiest ways to apply a ceramic coating to your car’s paint
- How professional detailers prep car paint for ceramic wax
- Two easy ways to maintain your ceramic coating
In the two decades since the invention of ceramic car coatings, these technologically advanced materials have proven to be a more durable alternative to traditional car wax. Many drivers think applying a ceramic based coating is too difficult to tackle at home and that they need to hire a professional detailer to do the job. That’s certainly a valid option, but, if you go that route, be prepared to give up your car for two days and expect to pay more than a thousand dollars for the work.
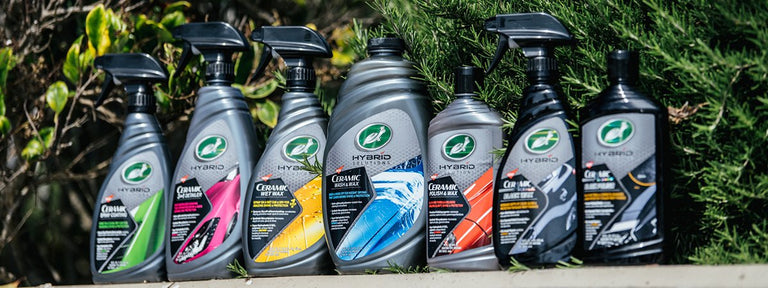
If that cost and inconvenience sound like a bit much for you, you’ll be happy to know the R&D labs at Turtle Wax have developed some easy-to-use, DIY products that deliver fast, water beading ceramic protection at a fraction of the cost. These Hybrid Solutions Ceramic products are just as easy to apply as their conventional wax counterparts, and you won’t contend with long downtime, like you would with a professional ceramic application.
With proper preparation and application, you can expect up to 12 months of paint protection from these DIY coatings – and even longer if you maintain the coating with an easy-to-use, ceramic spray topper.
If this more affordable, do-it-yourself option sounds like it’s up your alley, and you have a few hours to pull it off, keep reading. We’ll share everything you need to know to add incredible ceramic shine and protection to your car or truck!
Proper preparation is essential
Getting the shine, protection and hydrophobic properties you expect from your ceramic coating hinges on a few important factors, the most important of which is preparing your painted surfaces. Before applying wax coatings, be sure to thoroughly wash and dry your car, and don’t settle for a 15-minute car washing. You want your car to be perfectly clean before you cover the finish with ceramic paint sealant, chemical polymers or carnauba wax. This means you’ll need to remove contaminants that have become embedded in your clear coat. Once that’s done, you’ll want to remove any scratches, swirls or oxidation before you apply the wax.
Here’s a simple, step-by-step guide to the process, including prep:

1. Wash and dry the car.
Spray your vehicle with a strong stream of water, working your way from the roof down, to rinse away any loose soils. Using a microfiber wash mitt and a high-quality car wash soap in a bucket of water, scrub all soils off the paint, again, starting with the roof and working your way down to the bottom of your car. Dry with a soft, microfiber towel or use a leaf blower for no-touch drying action.
2. Remove embedded contaminants.
Place your hand in a plastic, zip-top, sandwich bag and glide it across the finish of your paint. If you feel any grittiness or tiny bumps in the paint, those are contaminants. You’ll need to remove them from the clear coat before applying a ceramic wax. Using a synthetic detailing clay and lubricant, wipe away the contaminants according to the package directions.
3. Correct the paint and apply a ceramic wax
If your clear coat has only light scratches, you can save yourself a lot of time by using a product like Hybrid Solutions Ceramic Polish & Wax. It removes light scratches, swirls and oxidation while laying down a coating of extremely durable, ceramic-infused wax. If you have moderate to heavy scratches or oxidation, you’ll need to break this work into two steps with a product dedicated to each.
Work from the top down in 2’ x 2’ sections, applying a small amount of Polish & Wax by hand with a foam applicator or with a dual-action machine polisher. Once you’ve rubbed Polish & Wax across the area, wipe away the residual product with a clean, microfiber towel and move to the next 2’ x 2’ section, overlapping the area you just completed to make sure you have complete coverage.
Pro Tip: Use a topper to keep your ceramic wax in terrific shape. To keep things simple, we recommend using a spray wax that’s formulated with additional ceramic ingredients, such as Hybrid Solutions Ceramic Spray Coating or Hybrid Solutions Pro Graphene Flex Wax.
Make it easy on yourself
There’s no good reason for making car care harder than it needs to be. Make life easier on yourself with a few handy tools.
First off, a stool (with or without wheels) will make waxing the lower areas of your car much, much easier. In a pinch, you can always use your wash bucket, turned upside-down.
You may have areas on your car where you don’t want wax. If so, use masking tape to cover those areas and just keep waxing easily and quickly right up to the tape without worries.
Try to keep a spray bottle with water by your side. Sometimes, excess wax doesn’t bond with the finish but doesn’t come off cleanly with a dry microfiber towel. If this happens to you, just mist the area with some water and wipe clean.

Featured Products
Ceramic Polish & Wax
$15.00
- All-in-one ceramic car wax and polish delivers the benefits of two ultra-premium products in a simple, one-step process for maximum efficiency
- Precision platelet technology smooths light scratches, swirls and paint transfer to return your car to like-new condition
- Formulated with hydrophobic, SiO2 polymers for intense water-beading action, chemical-resistance and a deep, cloud-reflecting shine
Hybrid SolutionsCeramic Polish & Wax
14.0 fl oz
$15.00
- Polish and Wax in One Bottle
- Adds a Ceramic Shine and Gloss Finish
- Apply with Machine or by Hand

Graphene Flex Wax
$25.00
- Buy One Get One Free on this Item - Use Code: B1G1FLEX
- Can not be used in conjunction with any other discount codes
- Ultra-premium car wax spray protects and shines wet and dry surfaces
- Patent Pending Graphene Infusion creates the Tighter Web Of Protection
- Simple spray-on solution can be used as a dry wax, rinse wax or even both!
Hybrid Solutions ProGraphene Flex Wax
23.0 fl oz
$25.00
- Buy 1 Get 1 Free Use Code - B1G1FLEX
- Flexible Use: Multiple Application Modes
- Pro Graphene: Advanced Protection

Ceramic Wax Spray
$15.00
- Astounding shine and lasting protection for paint, metal, plastic and glass
- Synthetic wax polymers increase your car’s depth of color, gloss and shine
- Super-hydrophobic, SIO2 formula delivers insane water beading and chemical resistance for up to one year
- Sweet Mango Tropical fragrance refreshes the senses for an enjoyable at-home detailing experience
Hybrid SolutionsCeramic Wax Spray
16.0 fl oz
$15.00
- Superior Shine: Best-In-Class Gloss
- Durability: Long-Lasting Protection
- Easy Use: Spray On, Buff Off
Thanks! You should receive a confirmation email shortly.
Ceramic Polish & Wax
$15.00
- All-in-one ceramic car wax and polish delivers the benefits of two ultra-premium products in a simple, one-step process for maximum efficiency
- Precision platelet technology smooths light scratches, swirls and paint transfer to return your car to like-new condition
- Formulated with hydrophobic, SiO2 polymers for intense water-beading action, chemical-resistance and a deep, cloud-reflecting shine
Graphene Flex Wax
$25.00
- Buy One Get One Free on this Item - Use Code: B1G1FLEX
- Can not be used in conjunction with any other discount codes
- Ultra-premium car wax spray protects and shines wet and dry surfaces
- Patent Pending Graphene Infusion creates the Tighter Web Of Protection
- Simple spray-on solution can be used as a dry wax, rinse wax or even both!
Ceramic Wax Spray
$15.00
- Astounding shine and lasting protection for paint, metal, plastic and glass
- Synthetic wax polymers increase your car’s depth of color, gloss and shine
- Super-hydrophobic, SIO2 formula delivers insane water beading and chemical resistance for up to one year
- Sweet Mango Tropical fragrance refreshes the senses for an enjoyable at-home detailing experience


Max Power Car Wash
$7.00
- Three levels of cleaning power from moderate to extreme for the wash best suited to your needs
- Removes stains, tar, tree sap and even old wax to prep and restore tired surfaces
- Fragrance-infused formula creates a pleasant atmosphere for a refreshing car care routine
WANT MORE TURTLE WAX?
Subscribe for your newsletter and the rewards will be in your inbox before you even get there
Latest
News, events and insights from Turtle Wax® worldwide
Offers
Exclusive offers and discounts on Turtle Wax® products
Rewards
Regular treats and surprises for all subscribers
Thanks! You should receive a confirmation email shortly.